Create a tenant
Access Tenants page
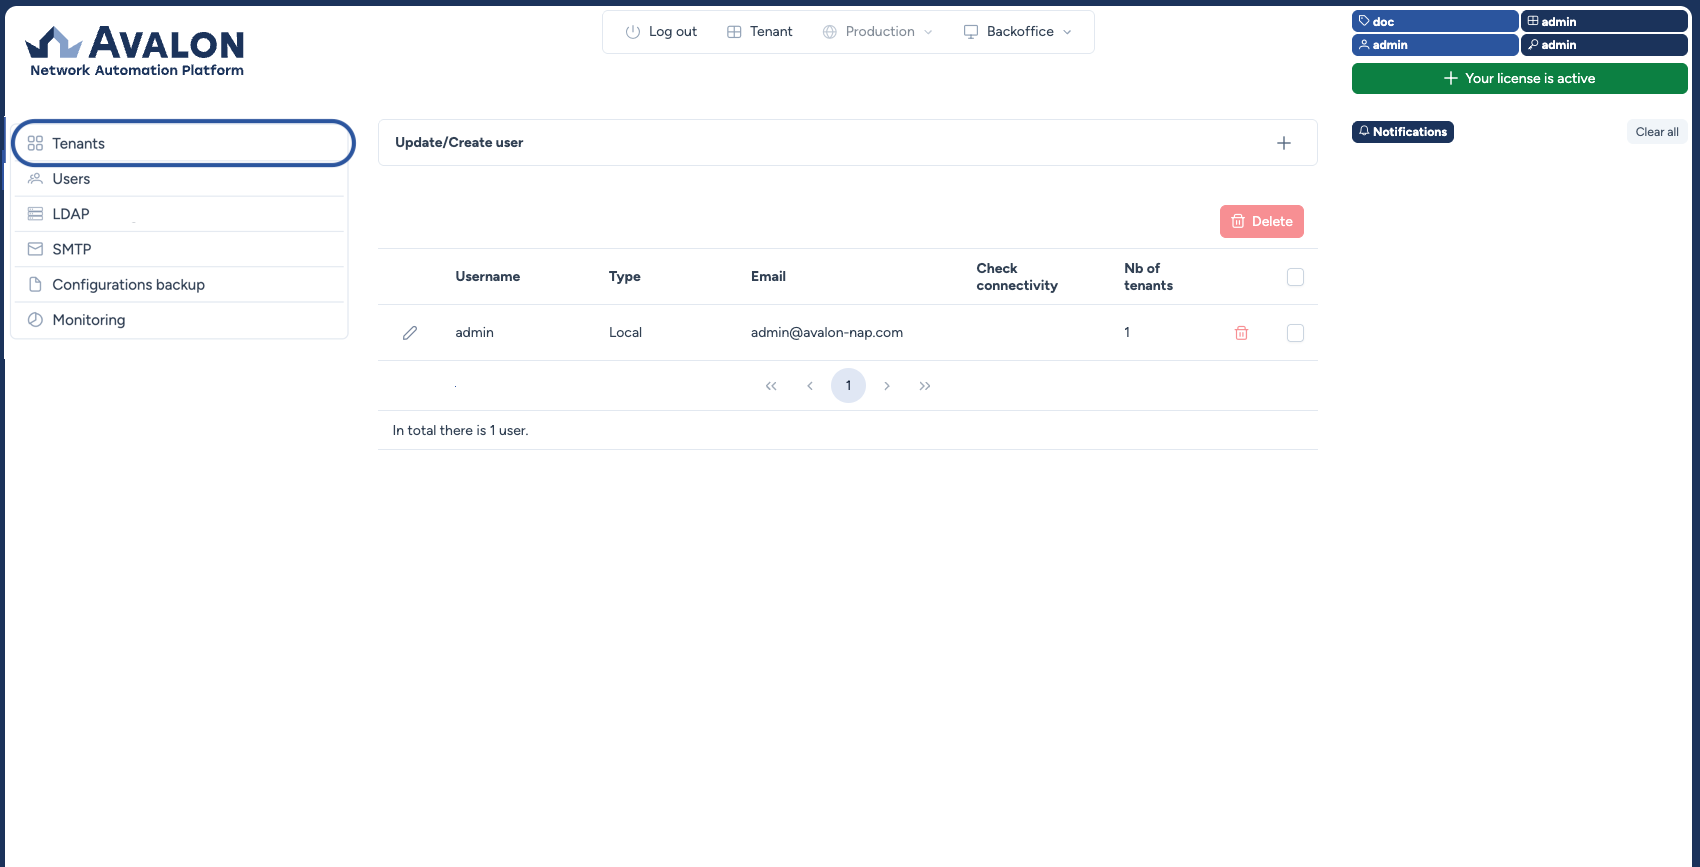
Access the tenant creation menu by navigating with the top tabs menu Backoffice → Administration
Let's use this screen to explain how the Avalon User Interface works.
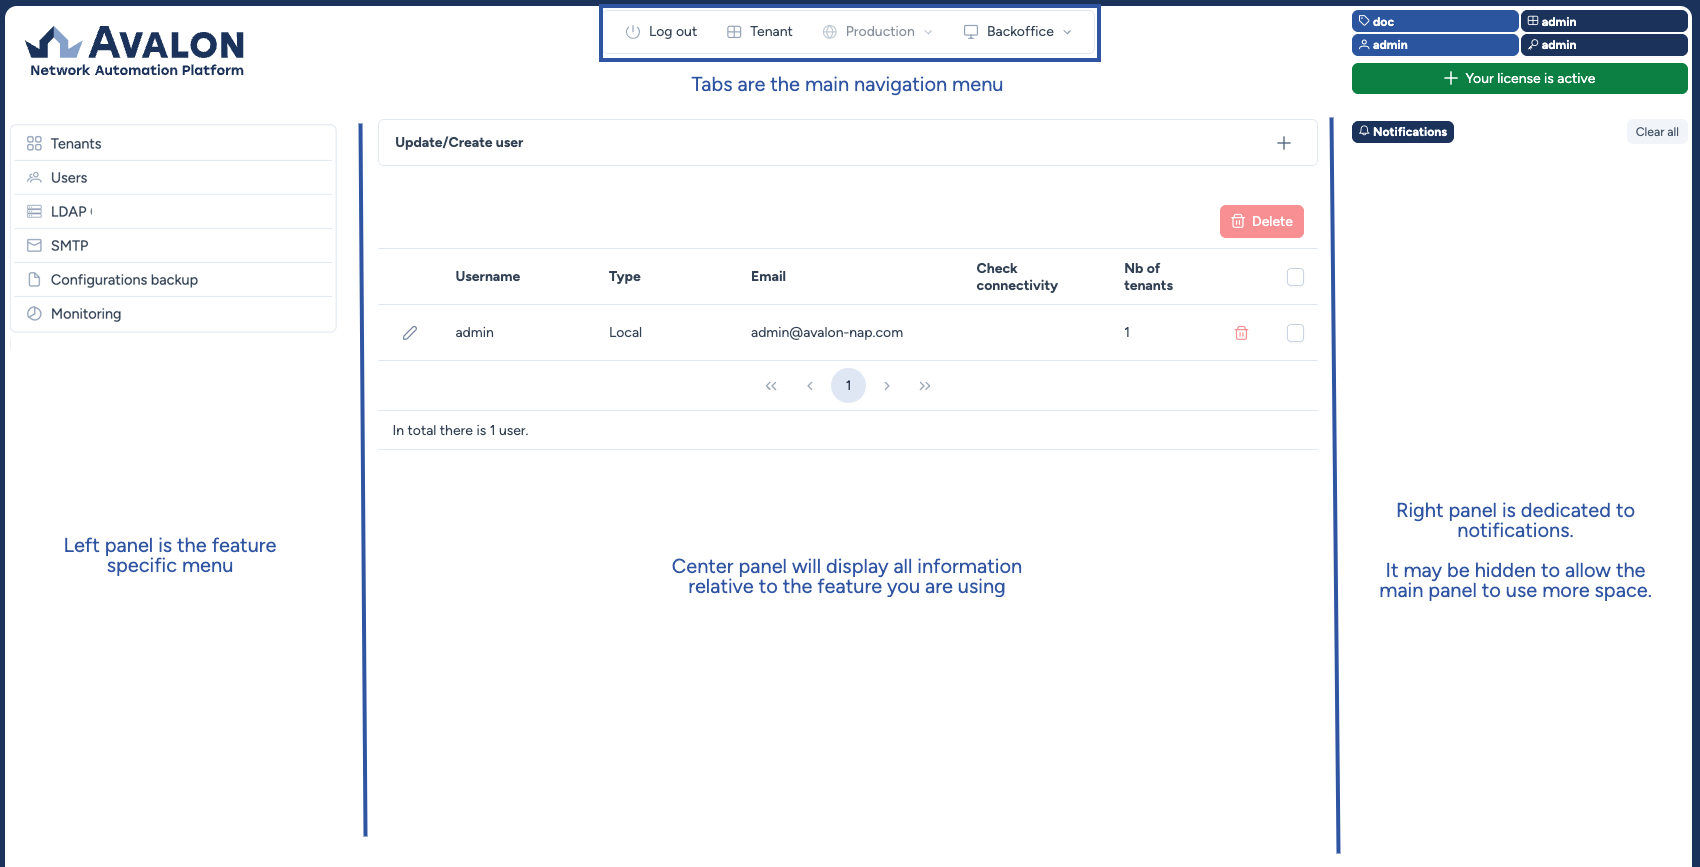
To configure a tenant, use the submenu on the left panel and click Tenants.
The central tenants panel displays a collapsible component that allows you to create or update a tenant.
Note
In this documentation, a component refers to a virtual element of the UI. It can be a form, a dropdown list, a multiselect list, a button, a datatable, etc.
You can access this form by clicking the + sign on the right side of the Create/Update Tenant component.
Below this form component, a table lists the existing tenant(s).
You can edit an existing tenant using the pencil icon on the left of the tenant row or delete it using the trash bin icon on the right.
Note
You cannot edit or delete the admin tenant.
The admin tenant is not a regular tenant. A regular tenant is one where you can add your network assets and manage your network.
Create a tenant
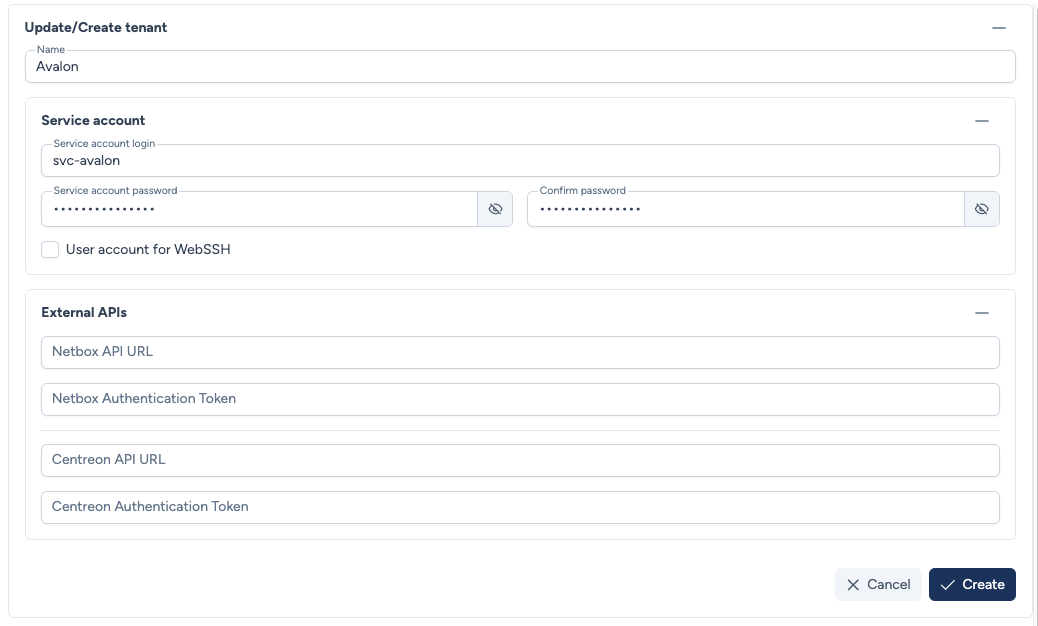
Let's now create a new tenant. You will need to enter the following information:
- Name: A mandatory name for your tenant.
- Service account login: Avalon supports a single service account to connect to devices for read/write tasks.
- Service account password: The service account password.
- Confirm password: Confirmation of the service account password.
- User account for WebSSH: You can use this user account to connect to a device via the integrated WebSSH client.
- External APIs: Avalon can use external APIs as an initial source of truth for the AutoDiscovery process.
In this initial setup, we will not use external APIs, so we will only enter a name and a service account:
Move to user creation!
Now that you have created a regular tenant, it's time to create your first user.